Pages

Jan 28, 2015

Bleaching red hair

[1]
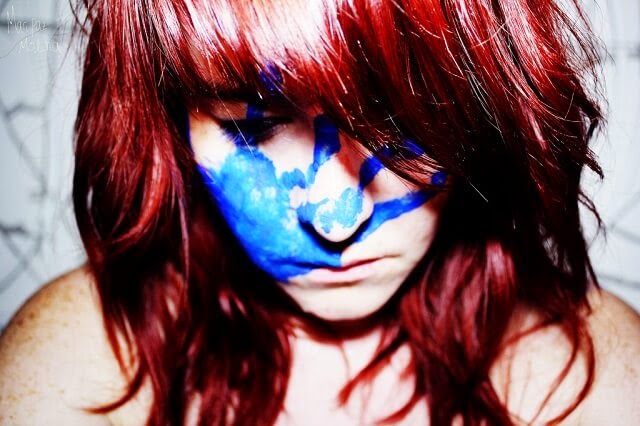
Do you have red hair and want to go lighter? Bleaching red hair is a slightly different process to bleaching other hair colours because the result will be much warmer and need to be properly neutralised to get the new colour that you want. If it's not done properly, the red tone can remain in the final colour and cause your hair to look orange.


Choosing a colour


The first step to bleaching red hair is of course to decide on the result you intend to achieve through lightening. You need to decide on the exact colour you want to achieve before you begin in order to formulate the bleach properly and apply the right colour afterwards.

Once you've found the colour you want, look at how light it is compared to your current colour. Specifically, start by looking at how much lighter it is. Bleach can lift up to 4 - 5 levels with ease in virgin hair, and sometimes as much as 7 - 8 if you're using high quality bleach powder and your hair isn't overly resistant.

Dyed hair, on the other hand, is far more difficult to lighten and it's usual to see a lift of about 3 levels, depending on how many times it has been dyed. If your hair has been previously dyed, you'll need to be more conservative with the new colour you choose, or prepare for the eventuality of having to bleach your hair a second time to get it light enough for your desired shade.
[2]

Choice of tone


Hair colour has a level, which is how light it is, but it also has another attribute called tone. This can be either cool or warm, and ranges from red to ash. As red is a warm tone and your red hair contains a lot of this warm red tone, you will need to select a shade of toner to neutralise this warmth.

This means that you can't necessarily just apply the exact shade you want. Even if you are making a transition from a dark red colour to a dark golden blonde, you couldn't achieve this by actually using a golden blonde dye.

Doing so would add golden tones to your hair, but it would still look orange because cool tone is required to correct some of the red that would otherwise remain present in the final colour. Bleaching red hair reveals this warmth, and it is necessary for to use toner to correct it to your desired shade.

In order to do this, use an ash dye that is one tone cooler than your desired shade, or select your toner based on this chart:

Desired shade Dye to use
Ash Lighten half level further - tone with ash*
Natural Tone with ash
Beige Tone with ash / natural mix
Golden Tone with natural
Copper Tone with golden / copper mix*
Lighter Red Tone with desired red

*Note: For a full ash result when bleaching red hair, the toner that is used must be applied to hair that has been lightened half a level lighter than the depth you actually want. Otherwise the ash isn't strong enough and produces more of a natural result. You can use a darker ash for proper toning, but this leads to a result that is darker than desired.

Copper results can be made vibrant through the use of the dye mixture in the table above. For a more subtle auburn colour, mix a copper shade with a natural shade and apply this instead. This same method can also be used for red colours where the intention behind bleaching red hair is to reach a lighter red. Pure red dye gives a vibrant result, whilst mixing with a natural tone makes the result more subtle.


Preparing bleach


To prepare your bleach to lighten your hair, the bleach powder must first be mixed with developer. The developer volume you use is dependent on the brand of bleach used.

[3]
Most generic brands of bleach are weaker and can be used with anything from 10 - 30 vol developer. Professional salon bleach is stronger and produces better results with less damage, but usually should not be used with anything stronger than 20 vol on scalp. Salon bleach will lighten more effectively with 20 vol than most generic brands can with 30 vol.

In order to prevent scalp irritation, never use a peroxide strength that is higher than the bleach powder manufacturer's recommended maximum strength for on-scalp use. You can generally use a higher volume for off-scalp highlights, but this should still be done with due care.

The developer also needs to be mixed in a certain ratio. For most bleach powders this ratio is 1:2 powder to developer, meaning that for every one part powder, you need to mix in twice as much developer. This can also vary by brand though and you should use the recommended ratio of your chosen brand for the best results.

Lightening Developer to use
1 Level 10 vol
2 Levels 20 vol
3 Levels 20 vol, process longer
4 Levels 30 vol generic / 20 vol salon
4 - 6 Levels Salon bleach only - 10 - 20 vol
Up to 7 Levels Salon bleach only - 20 vol


Applying bleach


Bleaching red hair is best done by sectioning your hair out properly first in order to ensure even results and prevent patches of darker redness in the final colour. To do this, part your hair down the middle from the front of your head to the back of your neck and then part it again from ear to ear, clipping each section up so that you're left with four sections.

[4]

To apply your bleach, use a tinting brush to apply to small layers of hair on both sides, moving from the top-most layer to the bottom layer of each section and then onto the next section until it's completely covered. Leave it for up to the maximum processing time for your chosen brand and either rinse at desired level or once the maximum time has been reached.

If your hair isn't light enough for your desired colour after the maximum processing time has been reached, you will either have to tone with a darker colour, or apply a second bleach process after allowing your hair to rest for at least a week. Only bleach again if your hair is in good condition and has been allowed to rest.


Toning your hair


After bleaching red hair, toning is necessary to neutralise or enhance upon the remaining red tone left in your hair. Using the chosen shade from the earlier table in this article, apply your toner to sectioned hair and allow this to develop until you reach your desired shade.

For cool tones like ash and natural, this may be reached sooner than the recommended development time. If this is the case, the dye can be removed at that point. It can also be left for a longer duration for a stronger and more vibrant tone.

More information:
  • How to bleach hair - Need to lighten your hair at home? Find out how to properly do this for the best results...
  • The colour wheel - Discover one of the most useful tools for corrective colour. With it you can tone out any unwanted colour from your hair...
  • Removing unwanted dye - Sick of your current colour? Find out how to remove dye and change your hair colour...

Need help bleaching red hair or choosing the right dye to reach your desired shade? Leave a comment for tailored advice...

Subscribe to email updates: Discover how to get professional hair at home!


Enter your email address:


How to lighten hair without bleach

[1]
Need to lighten your hair, but don't want to use bleach? No problem; there are other ways to lighten hair effectively and with less concern for the condition that your hair will be left in. Discover how to lighten hair without bleach!


Alternatives to bleach


While you may have heard a lot about natural lightening methods like lemon juice or chamomile, none of these are overly effective. Unless your hair is close to the desired colour and you only need to lighten it slightly, you won't have much luck with anything like this.

Dye, on the other hand, is a proven and logical way to lighten hair and can produce similar lightening to bleach when used appropriately. Any permanent dye that uses developer can be used for this purpose.


Lightening hair with dye


Permanent hair dye has two effects on your hair. Primarily, it deposits colour to add a new colour to your hair. It can also lighten your natural pigment though, and this is the effect that can be used to lighten hair without bleach. The reason this works is because of the hydrogen peroxide used as the developer in hair dye.

Developer serves to oxidise the dye compounds in the product and activate it so it can actually colour your hair, but it also has a lightening effect that is dependent on the concentration of developer used. A low volume of developer deposits colour with negligible lift, but a higher volume of developer deposits and lightens.

[2]

Developer volume


Developer volume is the most common measure of strength that can tell you how strong the product is. A higher volume means that more oxygen is released when it reacts. What this means is that 10 vol developer will produce 10 times its original volume in oxygen when it decomposes. It is this oxygen that reacts with and lightens your hair. A higher volume means more oxygen, and this means more lightening.

What effect does the volume have on a dye? Depending on the volume used:

  • 10 vol developer

    This volume of developer is mainly used for deposit only colour like darkening or toning as it produces a negligible and usually unnoticeable amount of lift. Use it whenever you want to tone or darken hair and don't need lightening.

  • 20 vol developer

    20 vol developer is a stronger preparation that can be used whenever you need 1 - 2 levels of lift. This volume of developer lightens and deposits.

  • 30 vol developer

    This is an even stronger concentration of developer, and can be used whenever you need 2 - 3 levels of lift. Of course, the higher the developer volume, the more likely it is you'll experience irritation from the dye.

  • 40 vol developer

    40 vol developer is the strongest developer that should be used in modern dye products. Whilst it wasn't unusual for hairdressers to use higher volumes like 50 or 60 in bleach years ago, this should never be tried today. Dye and bleach products have become stronger and more reliable with the use of lower volumes of peroxide and can produce damaging effects on your scalp and hair if mixed with a developer that is too powerful

    When added to permanent dye, 40 vol developer gives at least 3 levels of lift in most cases. However, its main use is in high lift dyes, where it needs to be used to drive the enhanced lightening. In the case of high lift dye, it's not impossible to see a lift of up to 5 levels; but it's more likely you'll get up to 4 levels of lightening. In any case, it's more irritating than lower volumes of developer and shouldn't be used on sensitive scalps.
[3]

Preparing dye


In order to take advantage of the lightening effects of developer, your hair shouldn't have been dyed previously. Hair dye only removes natural pigment, and it won't usually lift the artificial colour from a previous dye job. Dyed hair, unfortunately, needs to be lightened with bleach for best results. You can try and force it to lift with dye, but will likely be disappointed if you try.

You also need to use salon dye rather than box dye. Salon dye is separate from developer whilst box dye contains its own pre-chosen developer within the packet. You can choose to mix the dye from the colour tube in box dye with your own developer, but the results aren't as good as what you would achieve with salon dye. Of course, this is a matter of what you are comfortable using.

Preparation of the dye should be based on the colour result you want, and developer volume is chosen after consideration of the amount of lift you want. Using the specifications above, you can see that if you needed 2 levels of lightening, you would need to use at least 20 vol developer for this purpose.

Once you have chosen the appropriate developer, mix it in the correct ratio for your chosen brand. For most brands, this is a 1:1 ratio of dye to developer, but some brands call for a 1:1.5 ratio of dye to developer. This means that for every 1 part dye, you need to add a certain amount of developer to activate it.

After mixing your dye, apply it by brush or your preferred method to sectioned hair and develop for the recommended time for your specific brand. With most brands, you'll find that each developer increment adds about 10 minutes to the development time to allow for the extra lightening required. This means that a 20 vol preparation may take 30 minutes, but a 30 vol preparation may require 40 - 45 minutes.

[4]
Check your own brand for specific instruction. If in doubt, leave a comment and ask about your brand for more specific information.


Always use a cool shade


When lightening hair without bleach, you're still susceptible to the same problem of excess warmth that occurs when bleaching. The only difference is that the colour deposited by the dye can effectively tone and neutralise this as it lightens if the right shade is chosen.

To prevent too much warmth being revealed, always use an ash shade for a natural to slightly warm result. If you'd like a warmer result, use a natural shade. If you use the wrong shade or there is too much warmth to be toned by the dye, you can always tone separately after lightening.


High lift dye for blonding


Going blonde and don't want to use bleach? High lift dye is the best way to achieve this.

This kind of dye can lift up to 5 levels in some cases and is the best option other than bleach for lightening hair to blonde. Find out how to use these dyes properly... 

More information:

Do you have a question about how to lighten hair without bleach? Leave a comment for individual advice for all your own hair colour endeavours...

[5]

Subscribe to email updates: Discover how to get professional hair at home!


Enter your email address:


How to bleach your hair at home

[1]
Bleach is one of the most important chemical treatments used in hairdressing because it is the only thing that can actually significantly lighten hair. Do you need to lighten your hair to achieve the colour of your dreams? Find out how to bleach your hair at home for professional results.


How does hair bleach work?


Hair bleach works through a chemical process called oxidation, and this is a result of the oxygen that is released when peroxide and bleach powder are combined and applied to hair.

This means that for bleach to actually work, it needs to be mixed with developer. The strength of developer is the predominant force behind the strength of the bleach itself, and you can easily mix it in a way that makes it mild for subtle lightening or stronger for intensive lightening.


Developer volume


The volume of developer that is mixed with bleach refers to the concentration of hydrogen peroxide in the developer solution and how much oxygen it produces. In this sense, 20 vol developer is twice as strong as 10 vol developer as it liberates twice as much oxygen.

As well as giving you a rough idea of how strong the developer is, the volume of developer also gives you a good idea of the results you can achieve by using a particular strength with your bleach powder.


Lightening Generic powder Salon powder
1 Level 10 vol 5 vol
2 Levels 15 vol 10 vol
3 Levels 20 vol 10 vol - process longer
4 Levels 30 vol 15 vol
Up to 7 levels Use salon bleach 20 vol - process longer


Using the chart above can help you visualise the lightening power of each strength of developer when used in bleach. The developer volumes listed for generic power are for generic brands without boosters or lightening enhancers. Only use 30 vol developer on scalp if recommended by the manufacturer.

Salon powders, however, are much stronger. The above reference guide can be used for high quality powders like Igora Vario, Indola Rapid Blonde, Loreal Infinie Platine, Loreal Platinum Plus, and Wella Blondor Multi Blonde.
[2]

Mixing ratio


Hair bleach powder needs to be mixed with developer in order to work, but the mixing ratio is just as important as the developer volume used.

Whilst most lighteners require a 1:2 ratio of powder to developer for the best results, you have a little leeway either way if you need a thicker or thinner consistency for the results you want without much effect on the lightening. Just don't take too much liberty with this or it may not lighten as well.

Many salon brands have a much different ratio though, like Loreal's Infinie Platine, which has a ratio of 1:3. You will need to be aware of your particular brand's own mixing ratio to use it properly and get the best results.


Sectioning hair and applying bleach


When learning how to bleach your hair at home, it is important that you are careful to section your hair out rather than just apply bleach in a haphazard manner. Proper sectioning is paramount to beautiful, even lightening.
[3]

To section out your hair for bleaching, part it directly down the middle from the front of your head to the back of your neck so that it has been parted in half. Part it in half once more after this from ear to ear and you'll end up with four quadrants.

Each quadrant needs to be clipped together to keep the hair separate while you're working on it. Bleach is applied to one quadrant at a time, layer by layer and this makes it easy and very quick to completely cover your hair without patchiness or other problems.


Development


If you noticed that the developer chart contains references to processing the bleach for a longer time, this is where this comes into play. A certain volume of developer allows the bleach to lighten hair, but time is another factor that is important in gauging how well it lightens.

Whilst the maximum processing time is about 45 - 55 minutes for most brands of hair bleach, you won't always need to bleach for this long. Longer processing with the same volume of developer allows for increased lightening without actually increasing the strength of developer.

When preparing the bleach, choose the developer volume required for the lightening you want, and process only for as long as it takes to reach that level.


Rinsing


After processing, bleach needs to be rinsed thoroughly with water. This should be followed up with a gentle shampoo to ensure that any remaining traces of the product have been completely removed.

Lighteners are very drying on hair and this needs to be treated first by using a deep conditioner to kick start a process of moisture replacement that takes about a week before your hair begins to feel completely normal again. Until this moisture balance is returned, your hair can feel dry, rough, and be more prone to frizz and split ends.
[4]

After this, allow your hair to rest for a week. If you need to dye or tone your hair immediately after bleaching, this is fine to do as long as your hair is in good condition, but leaving it for a week can help alleviate any porosity problems that lead to darker than intended results or patchiness.

You can also start using protein treatments immediately after shampooing the bleach out, and this can be a great way to keep your hair healthy and get it back to its normal condition quicker. It will also help prevent porous hair and breakages.

More information:

Planning to bleach your hair and have more questions about how to bleach your hair at home? Leave a comment for tailored advice...

Subscribe to email updates: Discover how to get professional hair at home!


Enter your email address:


The hair color wheel

The hair color wheel is one of the most important tools used in hairdressing. Understanding it allows you to achieve any color result you want, and even allows you to correct any unintended mistakes. Committing it to memory is the one of the first steps to developing your skills and improving your home hair colors to get professional results at home.
Hair color wheel
The hair color wheel


What is the hair color wheel?


The hair color wheel is a wheel of colors that can be used to visualize how different colors interact with each other when you use dye. Colors that are opposite to each other on the wheel are called complementary colors and will neutralize each other, whilst other colors will blend together to form new colors.


Complementary colors


Determining the complementary color for a tone you want to get rid of is one of the most significant benefits of the hair color wheel. After enough use, you will be able to actively use this knowledge by simply looking at your hair and will no longer need the actual color wheel to find matching or neutralizing tones.

The reason this facet of the wheel is so powerful is that when used, it allows you to remove absolutely any unwanted tone from your hair. This is the key to hair color correction and an important skill used by any color correction specialist.

Whenever you want to get rid of a specific tone, look at that tone on the hair color wheel and then shift your gaze towards the color that is directly opposite to the unwanted tone. This is the unwanted tone's complementary color and if you add this color into your hair, it will neutralize the unwanted color.

You can see this principle at work when you look at how yellow tone is neutralized in blonde hair by using violet tone. As violet is added into the hair in the form of toner or blonde shampoo, the golden appearance is reduced until you eventually end up with a neutral result. The more violet tone that is added, the less yellow that will remain afterwards. This is because violet and yellow are complementary colors.

In a similar sense, you can also see that violet itself can be neutralized from your hair by using yellow color. You'd perform this kind of correction when dealing with hair colors like mahogany, burgundy, or violet brown; which all feature strong violet tones and require gold to be added into the hair to neutralize this violet if you want to get rid of it.

Can you see why the hair color wheel is so powerful yet?

Blending tone


Whilst the most common use of the hair color wheel is for toning and color correction, it also helps you see whether two colors can be blended, and helps you visualize what the effect of that might be.

Colors next to each other on the wheel can be blended to produce a tone that is somewhere in between the two colors that have been used. In the case of mahogany dye for example, a blend of red and violet takes place.

Even though red is a warm tone and violet is a cool tone, they don't cancel each other out or create a completely different color because they're not complementary tones and are located directly next to each other. Combining the two different tones produces a color that contains both warm and cool elements as it is a violet-red result, showcasing both tonal families.


Mixing tone


The hair color wheel has one last benefit to offer by showing you whether two tones will mix to form a completely new tone. Any color that isn't opposite or next to another color will mix.

As an example, a blue and yellow tone will mix together to form a green color. Even though it is a combination of cool and warm tone, they don't neutralize each other because they are not complementary.

This use of the hair color wheel has more of an indirect benefit because you can't actively use the wheel to see how two colors will mix, but you can get an idea by looking at the colors that are in-between the ones you are mixing. In this sense, you can see that mixing blue and red could create a color that could look anything from red, to violet, to blue depending on the mix ratio.

Need more help with the hair color wheel? Perhaps you're having trouble deciding which color you need to use for toning or correcting your own hair? Leave a comment for individual advice...

Subscribe to email updates: Discover how to get professional hair at home!


Enter your email address:


Frizzy hair remedies

Frizzy hair can be a real nightmare when you want your hair to look healthy and feel smooth. You don't have to live with it though, because with these frizzy hair remedies, you can rid yourself of the problem by not only treating frizz, but also by correcting the underlying issues that cause it.


Treating frizzy hair


Frizz occurs for a few reasons. A lot of the time it is natural and is simply a result of your hair type. The thicker your hair is, the more likely it will be prone to frizz because there is simply more hair and it tends to be more difficult to tame. You can also experience frizzier hair if you have a natural wave or curls, which causes the hair to naturally be a little unruly.

Of course, like any annoying hair condition, frizz is often the result of damage to either the deeper structure or the cuticle layers on the surface of the hair. Structural damage to the hair shaft needs protein treatments for adequate repair and reduction of frizz, whilst cuticle damage is more difficult to treat and best addressed with symptomatic remedies rather than a repair plan.

The type of hair you have, and whether you have sustained any damage to it through repeated colouring, lightening, or other treatments like perming and relaxing will determine which frizzy hair remedies will work best on your own hair.


Natural frizz


[1]
Naturally frizzy hair develops the problem because of its texture and thickness. It can also occur if you regularly suffer from dryness or when the ambient humidity affects your hair. If your hair isn't damaged, it needs to be tamed with symptomatic treatment as damage repair won't help in this situation.


Dryness


Dry hair is much more prone to frizz than hair that is properly moisturised because it has a more brittle texture. Hair that is dry loses its elasticity and this is one of the potential causes of frizzy hair.

Conditioning treatments are the best way to deal with frizz that's related to dry hair. If your hair is lacking moisture, you can help alleviate the problem with the use of a deep conditioner in place of your regular conditioner. Smoothing serums, and leave-in conditioners can also help immensely in treating recalcitrant dry hair that doesn't seem to respond to lighter remedies.

  • How to fix dry hair: Is dryness contributing to your hair problems? Find out how to correct it and hydrate your hair...

Damage


Like in the case of dry hair, damaged hair becomes frizzy partly because it can't maintain a proper moisture balance, and partly because the structure of the hair is compromised. This is related to the affect that damage has on the cuticles of the hair shaft that normally act to lock in moisture and shield the interior of the hair shaft from the outside environment and humidity.

The best frizzy hair remedies for damaged hair require the use of protein treatments. Conditioning treatments and leave-in treatments can soften your hair and make it feel good, as well as correct dryness, but there will always be an underlying problem because they can't repair the damage that has occurred to the cuticles and structure of your hair.

If you have damage, it is best to repair it with a good protein treatment like Redken Cat or Joico K-Pak Reconstructor before you even consider any other frizzy hair remedies. Once the damage is repaired and your hair is restored to better condition, any remaining frizz can be addressed with other methods.
  • How to repair damaged hair: Is damage the main factor behind your wild mane? Find out how to repair it. Whilst this article is aimed at bleached hair, the information can be used for any kind of damage...
[2]

Intensive remedies


After addressing any damage or dryness, the remaining frizzy hair remedies available to you are more intensive and are aimed at treating problem hair that hasn't responded to other treatments. The stronger treatments you can use include smoothing serums, balms, and keratin treatments.

Smoothing serums are the easiest remedy to use, and among the best products to actually own if you straighten, curl, or handle your hair often, because they have so many benefits. Not only can they prevent and treat dryness, but they can help lock in moisture, protect your hair from humidity, smooth out roughness, and even protect it from the heat of styling tools.
[3]

Keratin treatments, on the other hand, are the most intensive of all frizzy hair remedies, but still practical and beneficial to your hair. These kinds of treatments are set into the hair with heat, to repair damage and actively smooth and straighten your locks.

They're not as useful for wavy or curly hair if you don't want to lose the wave, but if you have straight hair or want to try straightening, they are one of the absolute best ways to smooth it out completely and without damage. The results are temporary and will rinse out over a number of weeks or months.


Frizz reduction plan


Can't seem to shake off the frizz? This is where an intensive frizz reduction plan comes into play. If you can't tame unruly frizz, this will do it or nothing will:


Address any damage or dryness

Treat any damage with protein treatments to correct any potential underlying issue. If you have dryness, use a deep conditioner every time you wash your hair. You need to ensure that your hair is as healthy as possible to prevent and treat frizz.


Use leave-in conditioner

After washing and towel-drying, always apply a good leave-in conditioner to frizzy hair to alleviate any further dryness. This will help keep your hair properly hydrated during blow drying and styling.


Use smoothing serum

Use smoothing serum, unless you're very prone to oiliness. When used before blow drying, straightening, or curling, serums will actively combat frizz and prevent damage from heat styling. They will also drastically help reduce frizz that is a result of humidity; especially in very hot or rainy conditions.


Try a smoothing balm

Joico's K-PAK Smoothing Balm is one of the best frizzy hair remedies if nothing else has worked. This product works in a similar way to a keratin treatment, but is more temporary, so curls and waves will return again after washing. After application, heat styling from a straightener or curling iron is necessary to activate the product and produce perfect, smooth results by setting it into your hair.


Keratin treatments

If you just can't seem to shake the frizz, a keratin treatment is the most intensive of all frizzy hair remedies and can help treat unruly tresses in even the worst cases. They can be applied at home or in salon and need to be set into damp shampooed hair with heat and then left untouched for 2 - 3 days. Afterwards, your hair remains smooth and straight for up to 2 months or more.

More information:

Do you have frizz and want to know more about any of these frizzy hair remedies? Leave a comment for tailored advice...

Subscribe to email updates: Discover how to get professional hair at home!


Enter your email address:


Jan 8, 2015

How to fix dry hair

[1]
Dry hair is a problem that affects many people. Hair that is dry feels rough and is a lot more prone to other problems like frizz, split ends, and breakages. This is because hair that isn't properly hydrated becomes brittle and is more susceptible to damage.

If your hair is like this, you don't have to suffer through it. You can fix dry hair and keep your hair looking and feeling healthy.


What causes dry hair?


Dry hair can occur naturally, but this is less common. In most cases, chronic dryness is due to previous use of dyes, bleaching, perms and relaxers, or even heated styling tools like straighteners and curling rods. The dryness is a result of the way these treatments affect your hair's cuticle layer.

The cuticle layer forms a protective scale-like covering that can be opened or closed. This protects the inner parts of the hair shaft from the environment. When you dye your hair or apply heat to it, these cuticles can be opened up. If they haven't sealed again afterwards, dryness results.

In the worst case scenario, hair that is significantly damaged can even be missing part of most of its cuticles. Hair like this is even more prone to dryness than any other hair type. In order to fix dry hair, either the cuticles need to be corrected, or the dryness itself needs to be symptomatically treated.

[2]

Sealing your hair


If your hair isn't overly damaged, your problems with dryness are more likely to be the result of open cuticles or a natural lack of oil. The first step to fixing dry hair is to seal the hair so that it can't continue to lose moisture.

This can be achieved by using conditioner every time you wash your hair and switching to a mild shampoo. Whilst shampoo opens your hair cuticles in order to wash your hair, conditioner seals them back up.
[3]

If your hair is stubborn or suffers from pH problems which are affecting the cuticles, it is beneficial to use a more acidic conditioner. This includes products like after-bleach rinses and sealing conditioners. These products will correct the pH of your hair and lock moisture in.

Whenever you use heated styling tools, you should follow up by allowing your hair to cool down afterwards and then applying a smoothing serum. Blow dry your hair in a direction that is from root to tip only. This helps to smooth the hair and seal it. When your hair is completely dry, switch to cold air to further lock in the style and condition.


Treating dry hair


If sealing your hair isn't enough to deal with your dryness, your dry hair is more likely the result of damaged cuticles or a lack of natural oil.

You can easily tell whether you don't have much natural oil by how often you need to wash your hair. If you can go three days or more without washing your hair and it doesn't feel or look oily, this is the cause of your dryness. If you do produce enough oil however, the problem is damaged cuticles.

The way you treat both conditions is very similar so you can address them both at the same time. The first step is choose a good leave-in conditioner and use this on your hair after washing. Applied to towel-dried hair, leave-in conditioners are an easy way to boost moisture levels and fix dry hair.


Intensive treatment


For many people, leave-in conditioner will be enough to treat their dryness and correct it. If you have very dry hair, it may be necessary to take this a little further, in which case you should switch your regular conditioner to a deep conditioning treatment like Redken Butter Treat.

Apply this in place of your regular conditioner and leave it for at least 5 minutes before rinsing it out. After towel-drying your hair, apply a leave-in conditioner, dry, and style as usual.

Dry hair that is given this intensive treatment is less prone to frizz and damage. If you plan to use any heated styling tools like a straightener, you should also apply a hair serum to your hair before and after use of heat.

Not only will a hair serum protect your hair from the heat, but it will also lock in moisture and seal your hair. If your cuticles are damaged, this is the best way to seal your hair as it acts like a barrier cream and locks in all the hydration from your conditioners. Hair treated with these serums is remarkably smooth, soft, and shiny afterwards.
[4]

Hair repair


The treatments above will give life back to your dry hair and can be started immediately, but for long term correction, it is important to repair any damage your hair has suffered. This is achieved by using protein treatments at least once a week until damage begins to be resolved.


Hair that contains structural damage can't hold onto moisture. Repairing this damage boosts your hair's ability to retain moisture, even when the cuticles are partially damaged. A product like Redken Extreme Cat Treatment can repair this damage and dramatically strengthen your hair.

    Do you have problems with dryness and need help to fix dry hair? Leave a comment for further advice geared towards your own individual hair...

    Subscribe to email updates: Discover how to get professional hair at home!


    Enter your email address: